Advanced functions in mapping
It is very common to include in a template a collection that needs to be filtered, as well as a field that requires to display today's date or a reference to a case's information.
You can include this information using the advanced functions found in the mapping control in the Configuration Wizard.
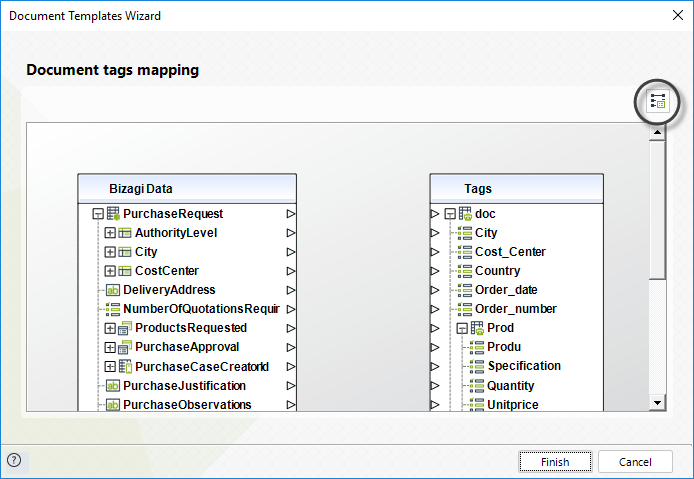
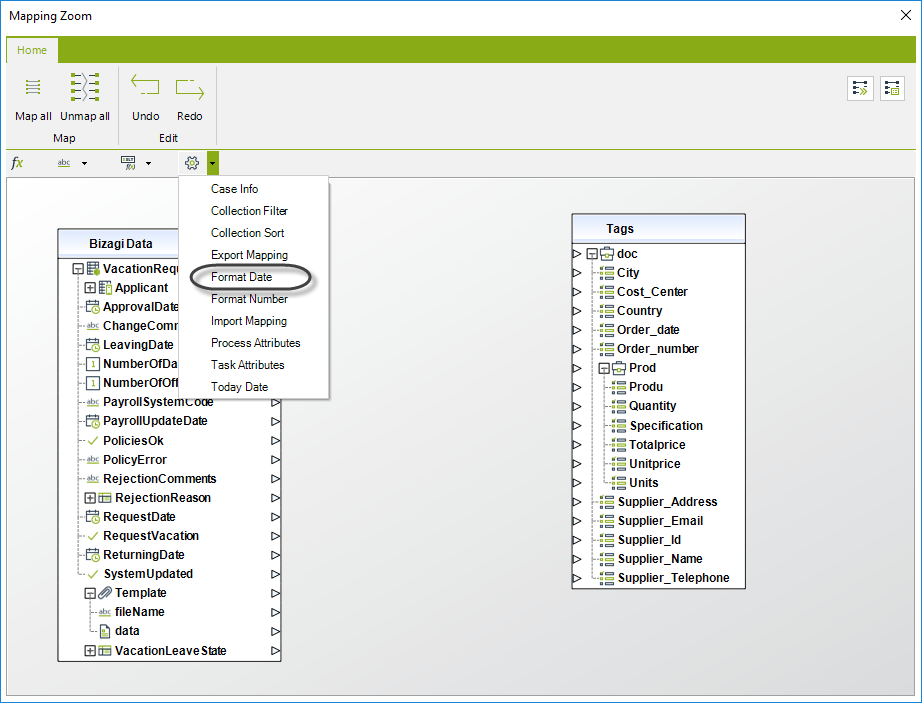
To access the advanced functions, expand the mapping control of the Configuration Wizard as displayed in the image below.
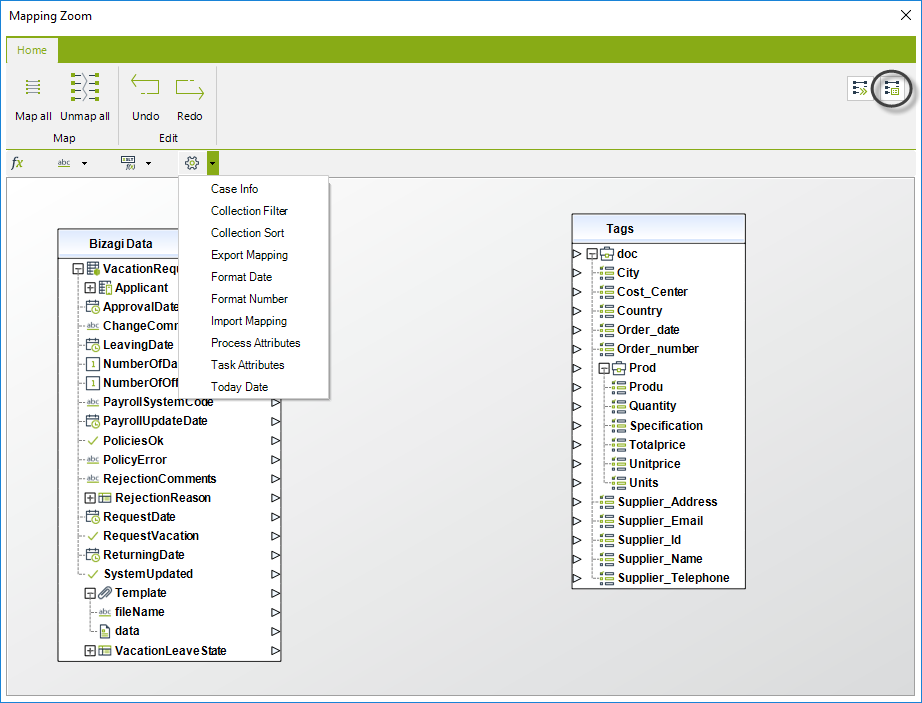
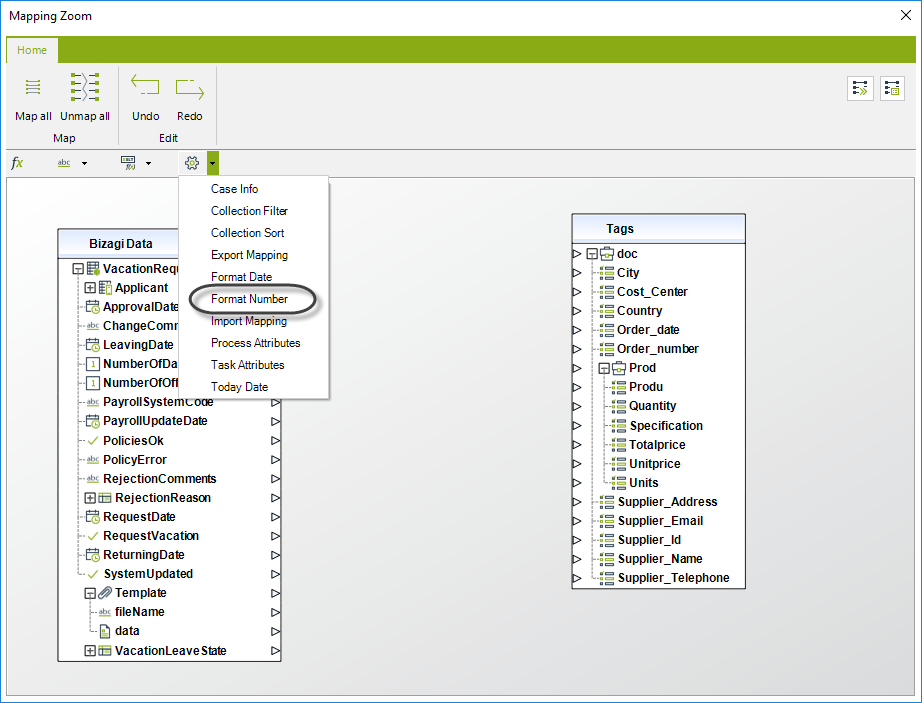
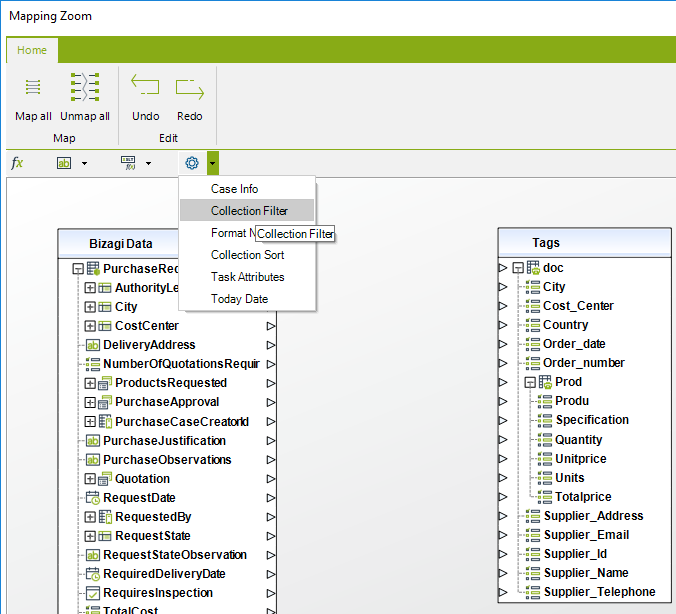
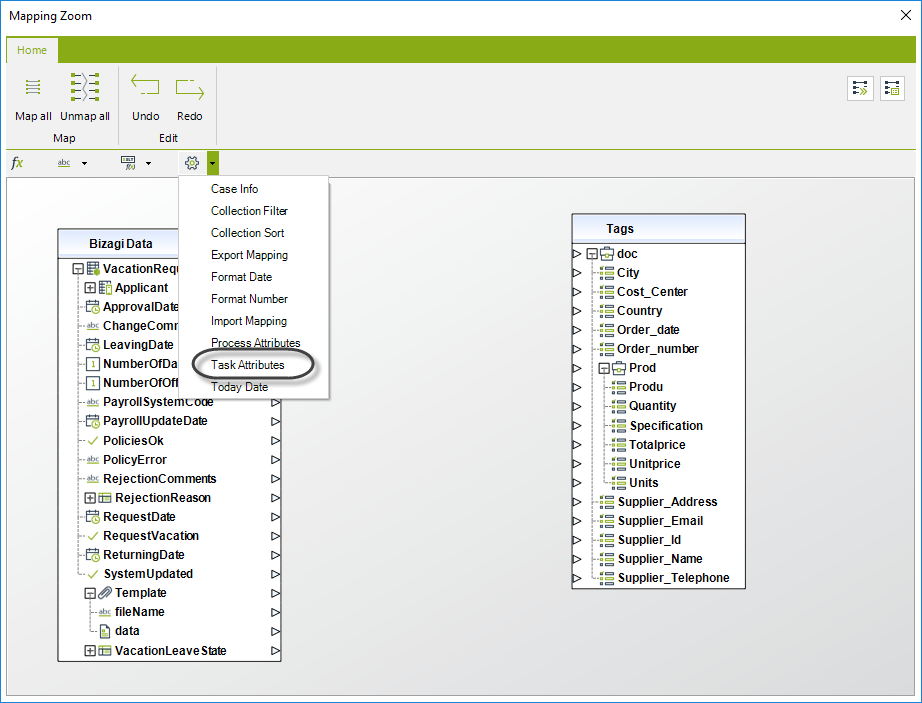
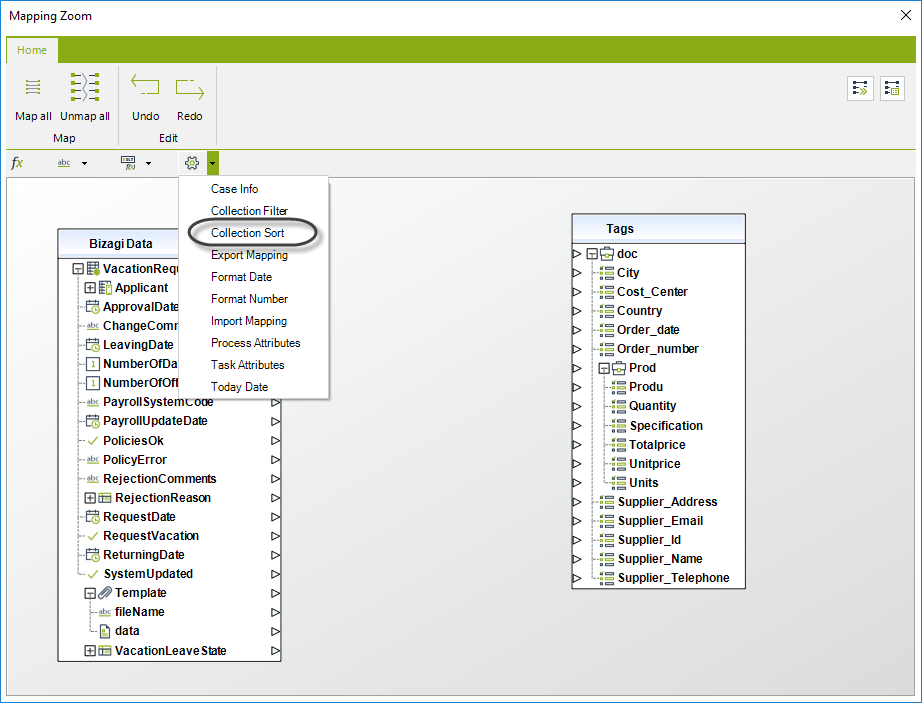
The advanced functions are found in the tools icon on the right, as displayed below. There are eight functions that you can use while mapping your attributes to the Template's tags:
- Case Info: includes the Case Id and the Case number
- Collection Filter: opens the collection filter feature to filter the records needed in the document
- Collection Sort: allows sorting table records based on a specific column
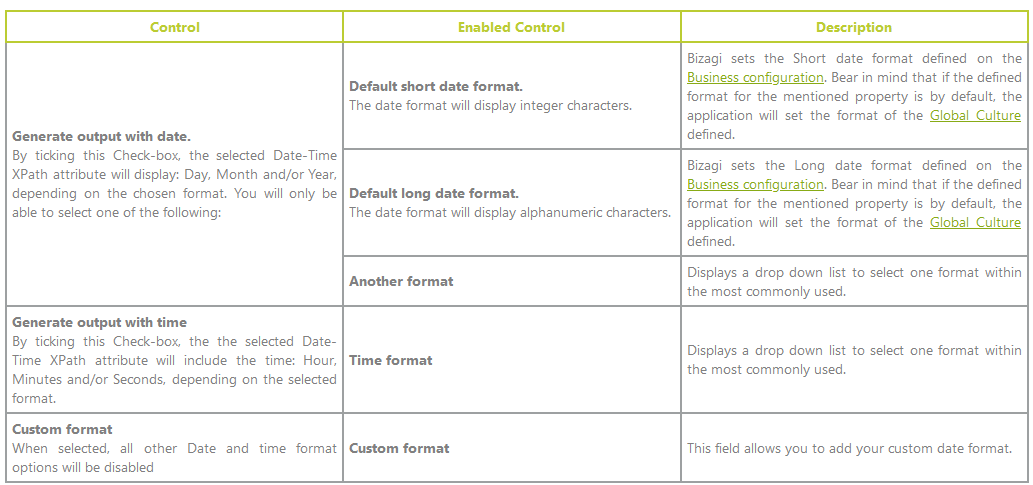
- Format Date: defines the format that will display the selected Date-time XPath attribute
- Format Number: defines the format that will display the selected integer/string XPath attribute
- Today Date: returns today's date
To restore the window to its original size, click on the icon on the upper right corner.
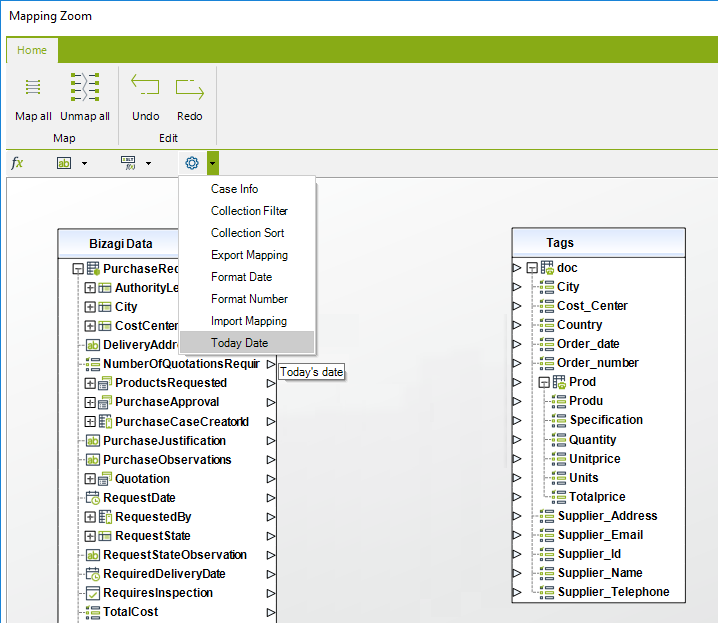
Include Today's Date
-
Display the advanced functions and drag and drop the function Today Date between the two tables.
-
A new window will display where you can select the format, that is, how you want the date to be displayed in the document. Click OK when you have selected a format.

-
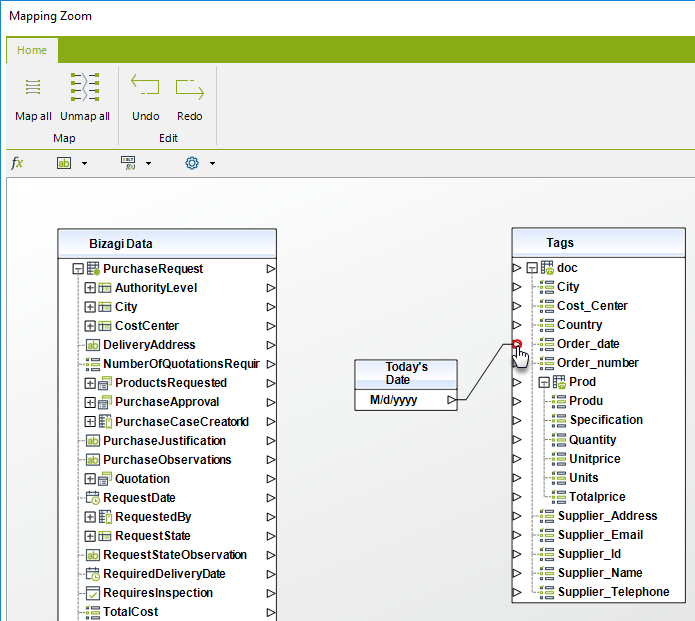
Map the function with the template's tag where the date should be saved.
-
Restore the window to its original size by clicking on the icon on the upper right corner and click Finish.
Format a Date
-
This function transforms a date into a string according to the selected format. This function receives a Date input and returns the string with the corresponding formatted date.
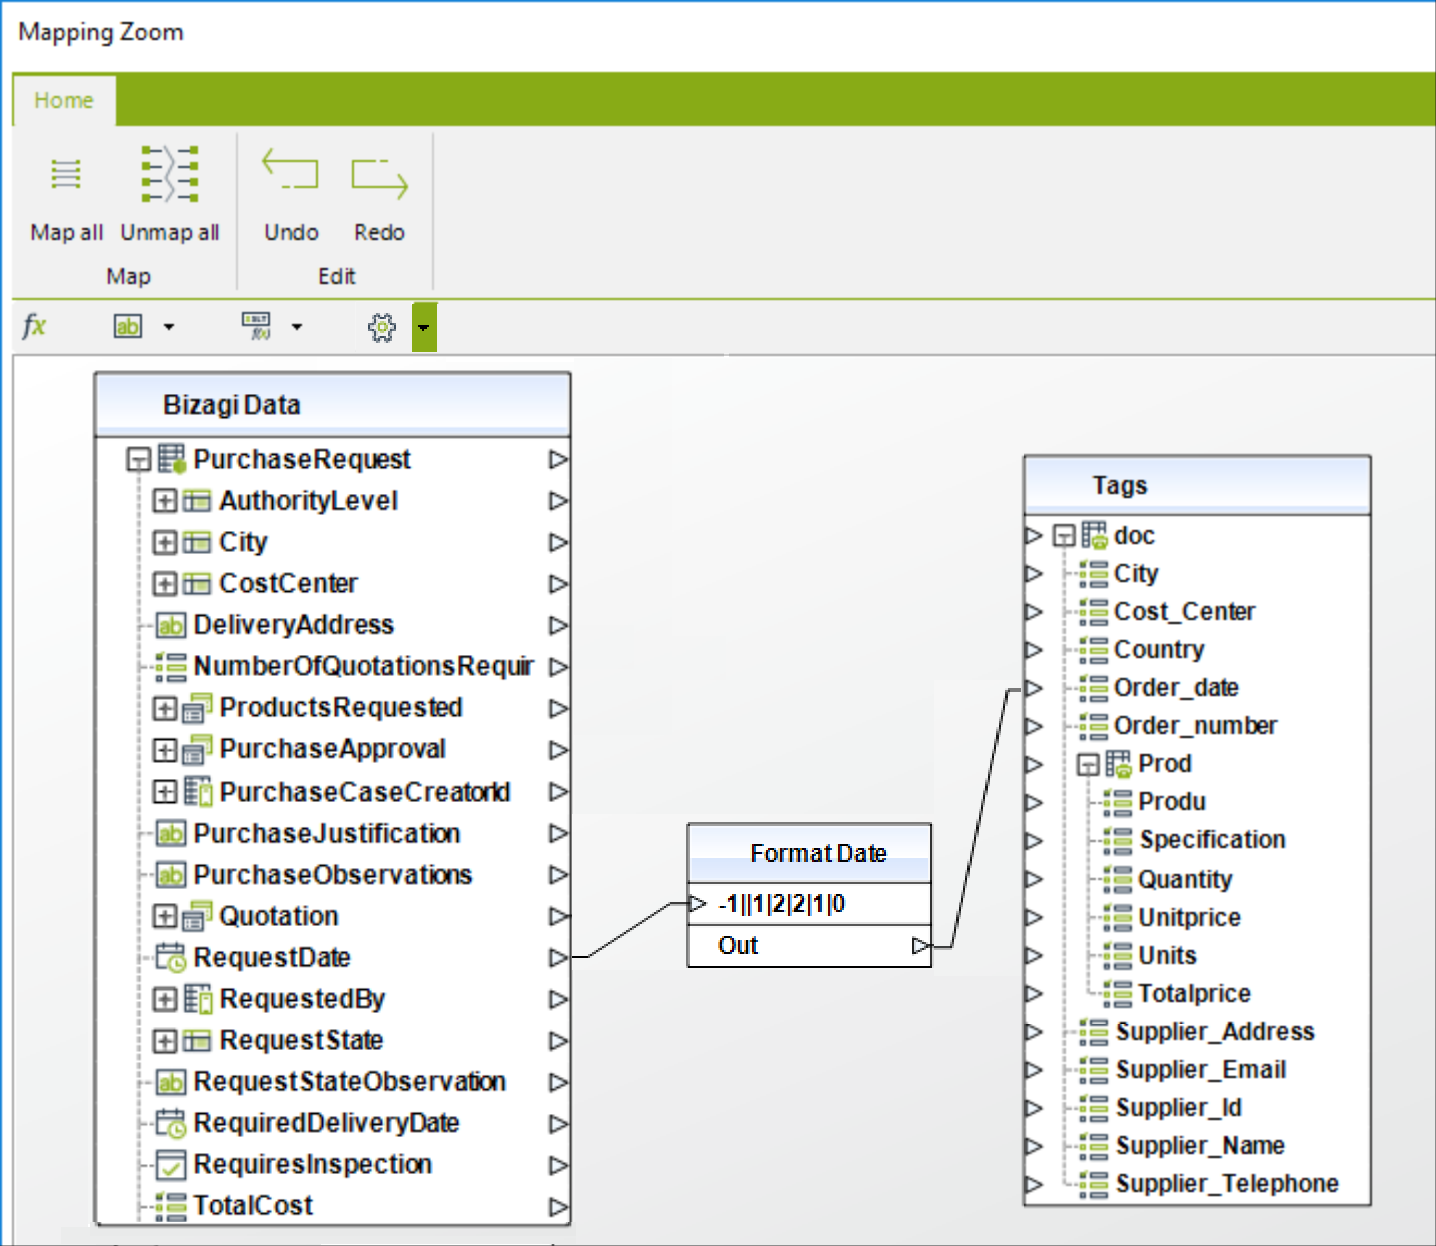
To use this function, select from the functions (fx) bar, then drag and drop this option into the main mapping window where your tables are.
-
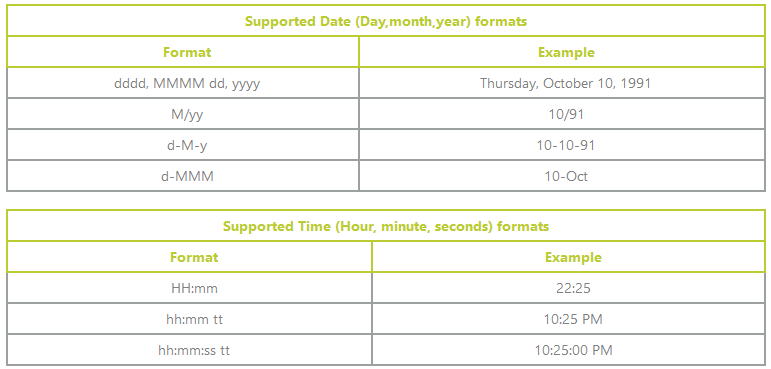
A new window will display where you can select the desired format within date, time, or custom:
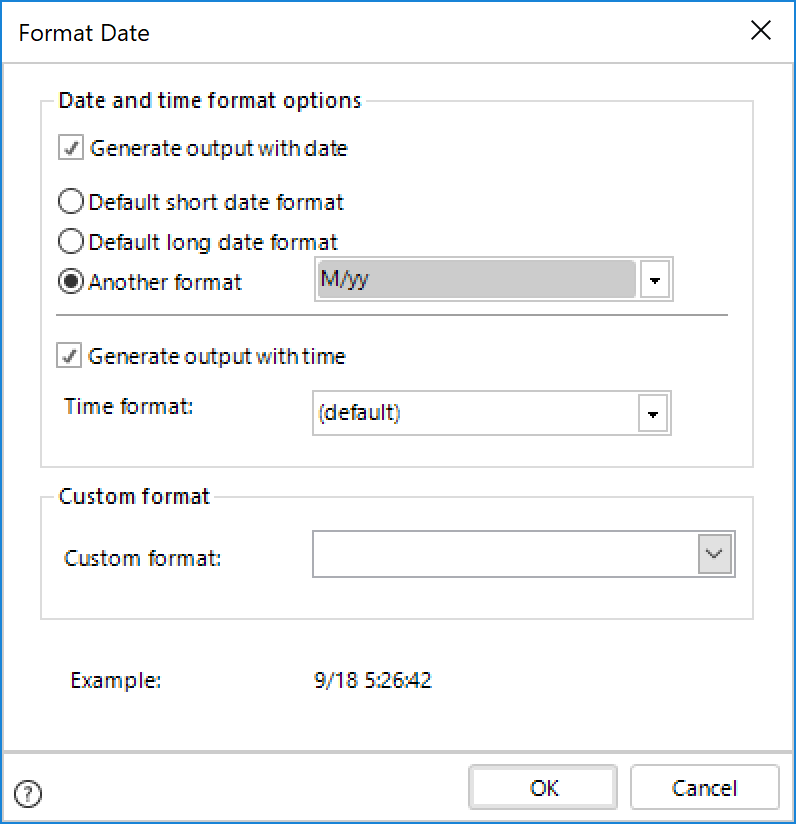
-
Map the function with the data model's attribute to be formatted and with the Template's tag where the date should be saved.
-
Restore the window to its original size by clicking on the icon on the upper right corner and click Finish.
Example
The following examples show how to configure Format Date to send from Bizagi some standard formats:
1- Date only in format dd/MM/yyyy
For June 24th, 2016, the result will be 24/06/2016.
Once the Format Date window is opened, perform the following:
-
Check Generate output with date
-
Select Default short date format
-
Uncheck Generate output with time
-
Click Ok
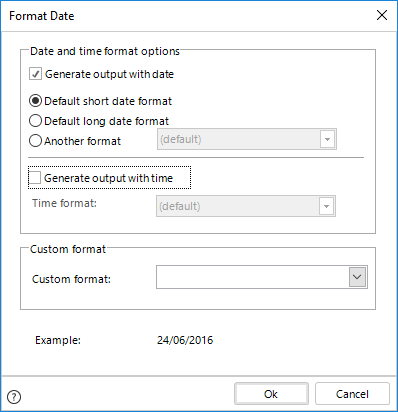
The result of the Date box will be:

2- Full Date and Time with time zone offset (yyyy-MM-ddtHH:mm:ssz)
For June 24th, 2016, 08:42:05 am in UTC-5, the result will be 2016-06-04a08:42:05-5.
Once the Format Date window is opened, perform the following:
- Copy and paste the format yyyy-MM-ddtHH:mm:ssz in the Custom format combo box
- Click Ok
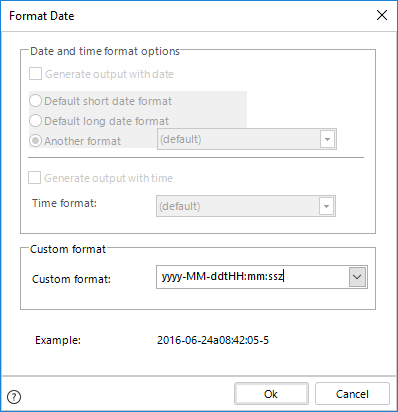
In the end, the result of the Date box will be:

The values presented on the Date box as input, will vary according the values set in the configuration.
Format a Number
-
Display the advanced functions and drag and drop the function Format Number between the two tables.
-
A new window will display where you can select the format, that is, how you want the number to be displayed in the document. Click OK when you have selected a format.

-
Map the function with the data model's attribute to be formatted and with the Template's tag where the date should be saved.
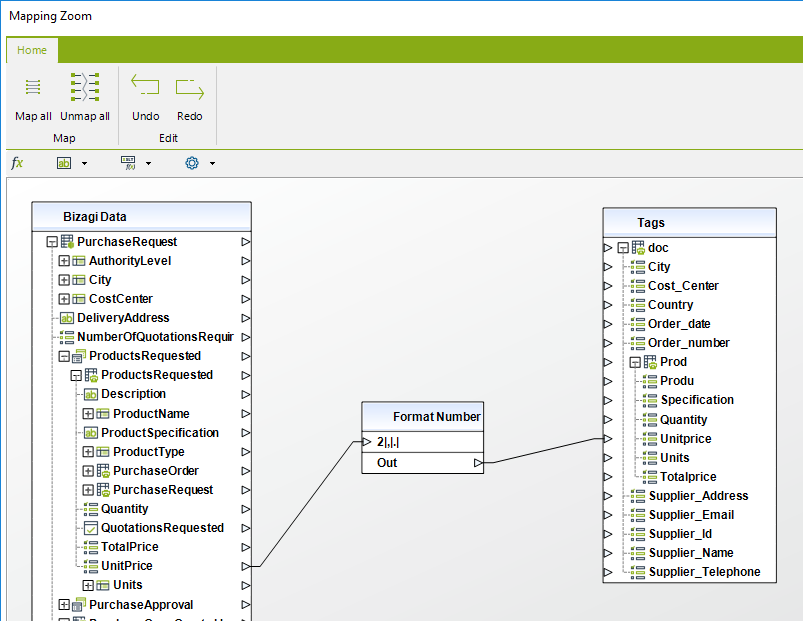
-
Restore the window to its original size by clicking on the icon on the upper right corner and click Finish.
Include a Filtered Collection
-
Display the advanced functions and drag and drop the function Collection Filter between the two tables.
-
Map the function with the data model's attribute where the collection is saved. This will display the collection filter where you can include the conditions to filter the records. Click Ok when the filter is included.
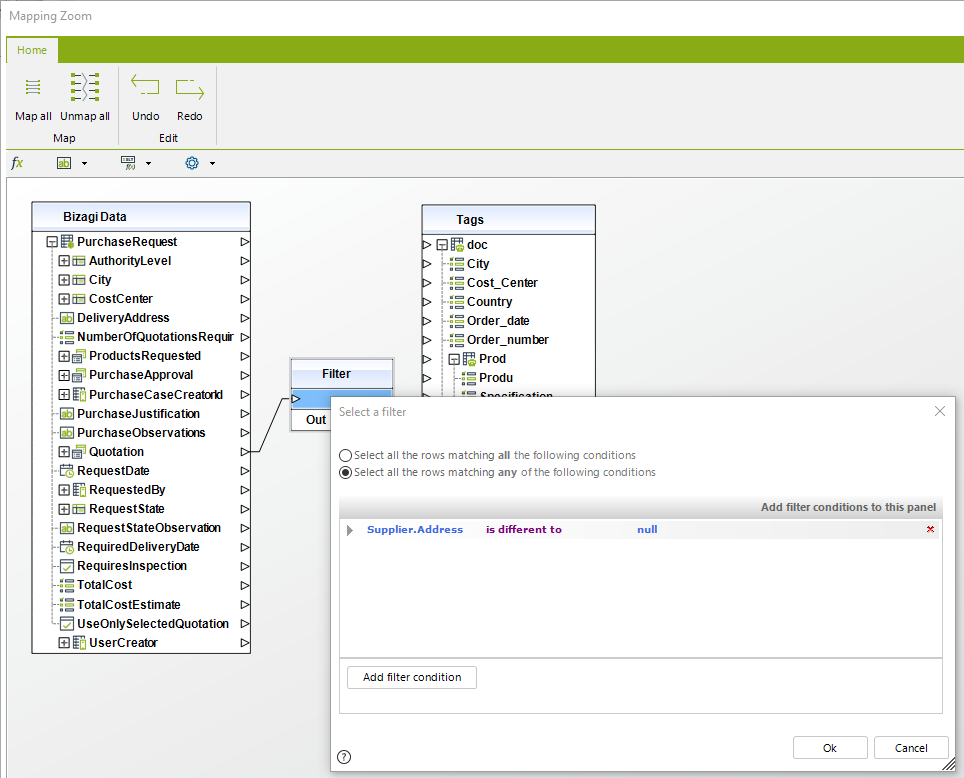
-
Map the function to the Template's tag where the collection is. Note that the collection is mapped from the data model to the tag but with a function in the middle that will filter the records of the existing table.

-
Restore the window to its original size by clicking on the icon on the upper right corner and click Finish.
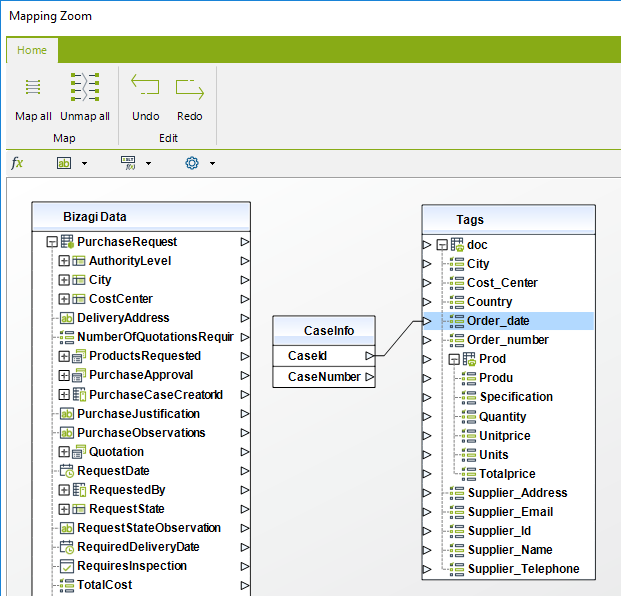
Include Case's Information
-
Display the advanced functions and drag and drop the function Case Info between the two tables.
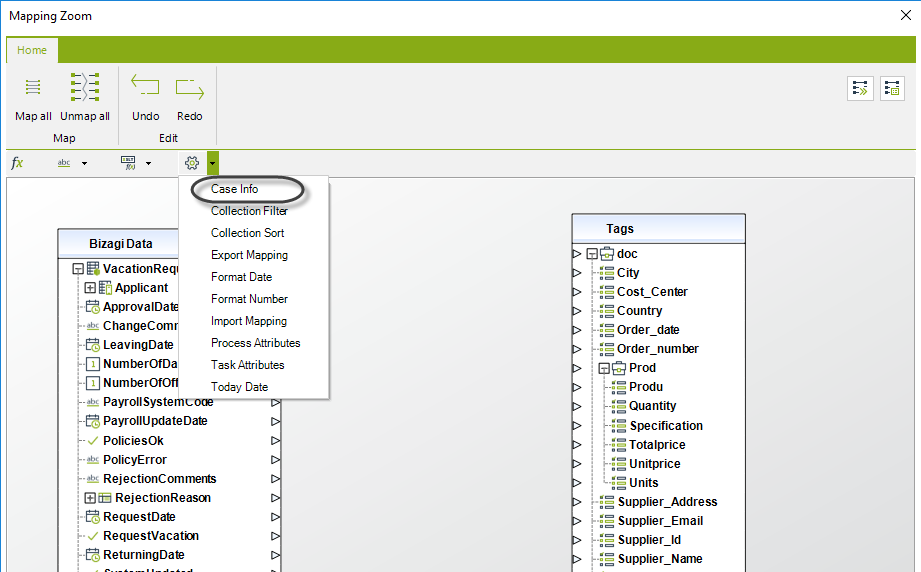
-
Map the function desired with the Template's tag where the case's information should be saved.
-
Restore the window to its original size by clicking on the icon on the upper right corner and click Fin
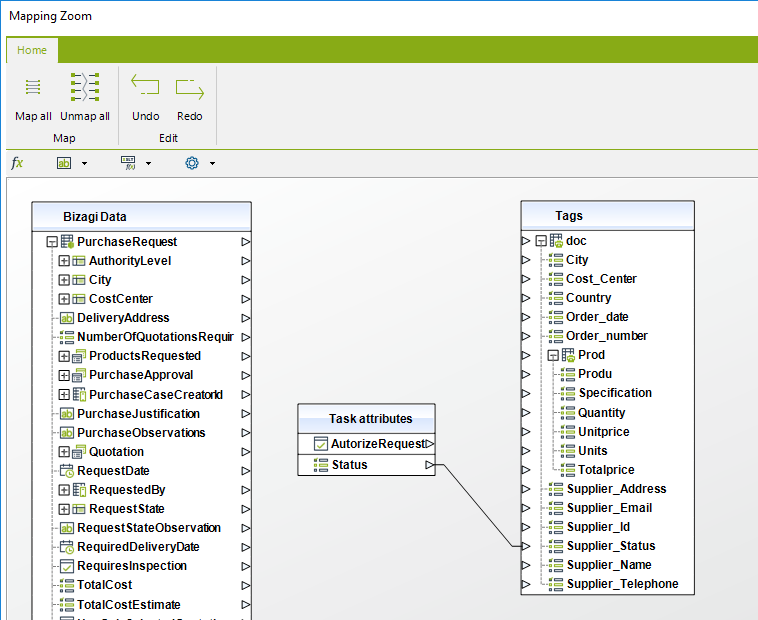
Include Process or Task Attributes
These attributes are temporarily used to store information that is not part of the data model for a short time. For more information, refer to the Temporary Attributes article.
-
Display the advanced functions and drag and drop the function Process attributes or Task attributes (as your need) between the two tables. Remember these options will only appear if you have already defined process or task attributes.
-
From the new table, map the desired attribute with the Template's tag where the information should be saved.
-
Restore the window to its original size by clicking on the icon on the upper right corner and click Finish.
Note:
Both process and task attributes can only be created from the utilities list of the tags mapping window. Process attributes exist during the process execution, while task attributes exist during the task transaction.
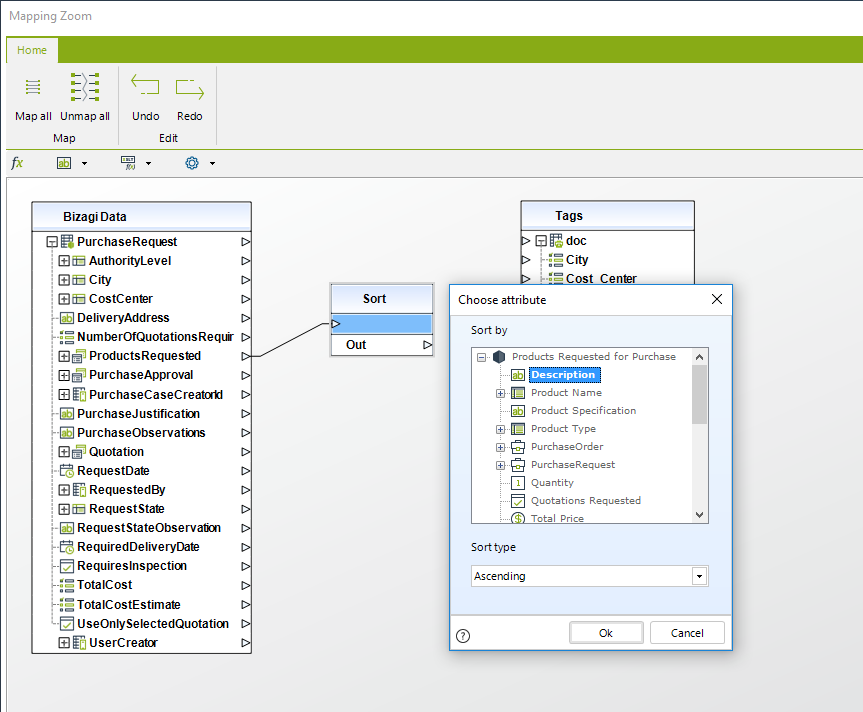
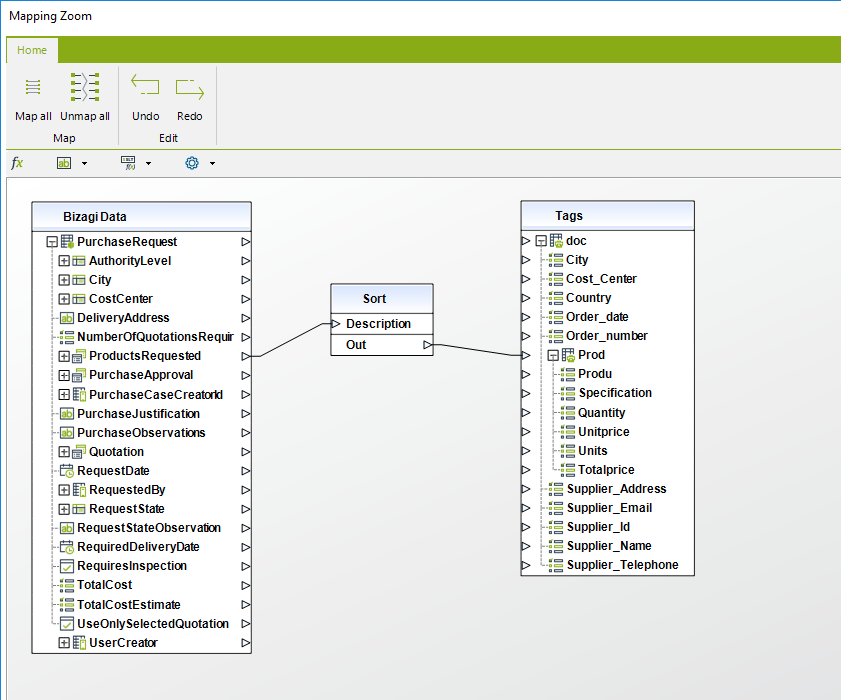
Sort a Collection by a Specific Column
-
Display the advanced functions and drag and drop the function Collection Sort between the two tables.
-
Map the function with the data model's attribute where the collection is saved. This will display an XPath window where you can choose the sort by attribute and the sort type (ascending or descending). Click Ok.
-
Map the function to the Template's tag where the collection is. Note that the collection is mapped from the data model to the tag but with a function in the middle that will sort the records of the existing table.
-
Restore the window to its original size by clicking on the icon on the upper right corner and click Finish.
Delete a Function
To delete an advanced function, click over it and press the Delete key. All mappings will be lost.